The aroma of freshly baked Halloween Mummy Cookies wafts through your home, wrapping you in a warm hug of buttery sweetness and chocolatey goodness. These delightful treats are not just festive; they invoke memories of childhood Halloween parties filled with laughter and sticky fingers grabbing for the next sugary delight. delicious spider web pretzels.
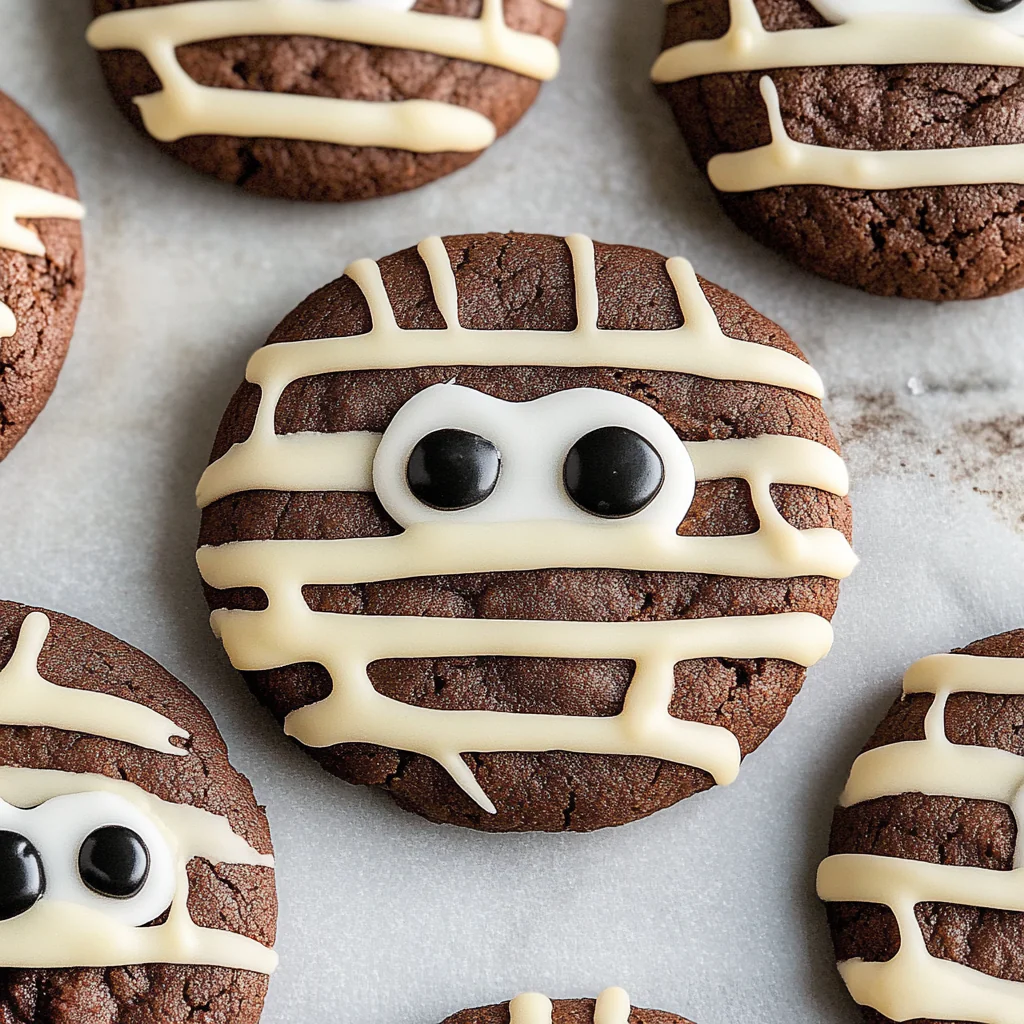
As you prepare to make these spooky snacks, excitement bubbles up like a cauldron brewing the perfect potion. Just envision the delighted faces of friends and family as they unwrap these eerie yet adorable cookies, revealing gooey chocolate beneath layers of white icing. The anticipation is palpable!
Why You'll Love This Recipe
- Halloween Mummy Cookies are incredibly easy to make, even for novice bakers
- Their playful design brings joy and laughter to any gathering
- Each bite combines rich flavors with a fun texture that will have everyone reaching for seconds
- Perfect for classroom parties or cozy nights in front of the TV watching scary movies!
I remember the first time I made these cookies; my kids couldn’t stop giggling at their “mummified” look, and we ended up sharing them with our neighbors who were equally charmed.
Essential Ingredients
Here’s what you’ll need to make this delicious dish:
- All-Purpose Flour: Use high-quality flour for the best texture; it’s the backbone of your cookies.
- Granulated Sugar: Sweetness is key; adjust based on your taste preference.
- Baking Powder: A must-have for achieving those perfectly puffy cookies.
- Unsalted Butter: Use softened butter for easier mixing and richer flavor.
- Eggs: One large egg helps bind the ingredients together beautifully.
- Vanilla Extract: A splash adds depth to the overall flavor profile.
- Chocolate Chips: Semi-sweet chips provide a delightful contrast to the sweet cookie base.
- White Icing or Royal Icing: Essential for creating those spooky “mummy” wraps.
- Candy Eyes: These little guys bring your mummies to life with personality! candy corn fruit parfaits.
The full ingredients list, including measurements, is provided in the recipe card directly below.
Let’s Make it together
Preheat your oven: Start by preheating your oven to 350°F (175°C). This ensures that your cookies bake evenly and achieve that golden perfection.
Mix dry ingredients: In a bowl, whisk together flour, baking powder, and a pinch of salt until well combined. This step is crucial for even distribution.
Cream butter and sugar: In another bowl, beat softened butter and granulated sugar until light and fluffy. You should see it turn pale in color; this is key for great texture.
Add eggs and vanilla: Beat in one egg at a time along with vanilla extract until fully incorporated. The mixture should be smooth and creamy—like a dreamy cloud!
Combine wet and dry ingredients: Gradually add in your dry mixture to the wet ingredients while mixing until just combined. Don’t overmix; you want soft cookies that melt in your mouth!
Fold in chocolate chips: Gently fold in semi-sweet chocolate chips, ensuring they’re evenly distributed throughout the dough. Your dough should feel rich and indulgent now!
Scoop onto baking sheets: Using a cookie scoop or spoon, drop rounded tablespoons of dough onto lined baking sheets. Leave space between each cookie as they will spread during baking.
Bake: Place them in the preheated oven for about 10-12 minutes or until edges are lightly golden. Keep an eye on them; no one likes burnt mummies!
Cool down: Let them cool on baking sheets for five minutes before transferring to wire racks. While they cool, prepare your decorating supplies!
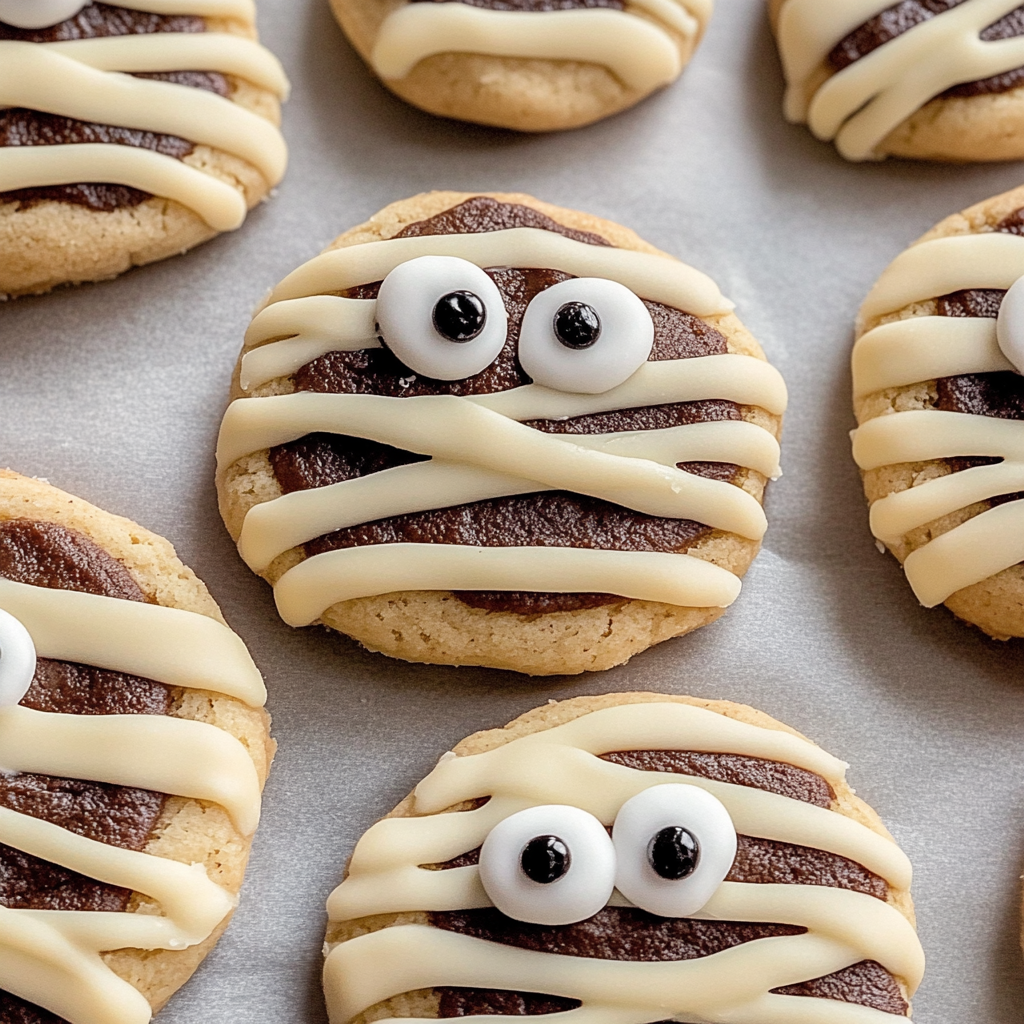
Decorate with icing: Once cooled completely, drizzle white icing over cookies in zigzag patterns resembling mummy wraps. Finish off with candy eyes strategically placed for maximum cuteness!
Serve and enjoy: Gather your friends or family around as you unveil these Halloween Mummy Cookies—watch their faces light up like it’s Halloween night! fun monster popcorn mix. spooktacular monster mash mix.
Now you’re all set to create these spooktacular treats that promise not only delicious flavors but also laughter-filled memories! Happy baking!
You Must Know
- These Halloween Mummy Cookies are not only adorable but also incredibly easy to make
- The combination of sweet dough and creamy icing makes them a hit for any spooky celebration
- Their fun, festive look will impress your guests and delight the kids!
Perfecting the Cooking Process
To get perfect Halloween Mummy Cookies, bake the cookies first, then let them cool completely before decorating with icing. For more inspiration, check out this Delightful Easter M&M Cookies recipe.
Add Your Touch
Feel free to swap chocolate chips for colorful candy pieces or use different icing flavors to customize your Mummy Cookies.
Storing & Reheating
Store leftover cookies in an airtight container at room temperature for up to one week. No reheating needed!
Chef's Helpful Tips
- For perfectly spooky cookies, chill the dough slightly before baking to prevent spreading
- Use a piping bag for easy icing application and avoid over-baking to keep cookies soft and chewy
- Make sure the icing is thick enough to hold its shape, ensuring your mummies look great!
Sharing these Halloween Mummy Cookies with friends always brings laughter and joy. They vanish faster than I can decorate them!
FAQ
How do I make the cookie dough less sticky?
Chill the dough in the refrigerator for about 30 minutes before rolling it out.
Can I use store-bought icing?
Absolutely! Store-bought icing saves time and still looks great on your mummy cookies.
What’s the best way to pipe the icing?
Use a piping bag fitted with a small round tip for precise control when creating mummy bandages.
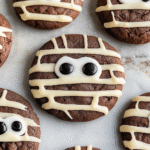
Halloween Mummy Cookies
5 Stars 4 Stars 3 Stars 2 Stars 1 Star
No reviews
- Author: Mery Mack
- Total Time: 27 minutes
- Yield: Makes about 24 cookies 1x
Description
Halloween Mummy Cookies are a fun and delightful treat that brings festive cheer to any gathering. With their charming “mummified” appearance, these cookies are not only visually appealing but also bursting with buttery sweetness and chocolatey goodness. Perfect for Halloween parties or cozy nights in, they’re sure to be a hit with family and friends!
Ingredients
- 2 ½ cups all-purpose flour
- 1 cup granulated sugar
- 1 tsp baking powder
- ½ cup unsalted butter (softened)
- 1 large egg
- 2 tsp vanilla extract
- 1 cup semi-sweet chocolate chips
- 1 cup white icing or royal icing
- Candy eyes for decoration
Instructions
- Preheat your oven to 350°F (175°C).
- Whisk together flour, baking powder, and a pinch of salt in a bowl.
- In another bowl, cream together softened butter and granulated sugar until light and fluffy.
- Add the egg and vanilla extract, mixing until smooth.
- Gradually combine the dry ingredients with the wet mixture until just mixed.
- Fold in chocolate chips.
- Drop rounded tablespoons of dough onto lined baking sheets, spacing them apart.
- Bake for 10-12 minutes until edges are golden; cool before decorating.
- Drizzle with white icing in zigzag patterns and top with candy eyes.
- Prep Time: 15 minutes
- Cook Time: 12 minutes
- Category: Dessert
- Method: Baking
- Cuisine: American
Nutrition
- Serving Size: 1 cookie (30g)
- Calories: 150
- Sugar: 10g
- Sodium: 50mg
- Fat: 7g
- Saturated Fat: 4g
- Unsaturated Fat: 3g
- Trans Fat: 0g
- Carbohydrates: 20g
- Fiber: 1g
- Protein: 2g
- Cholesterol: 15mg

